Just-in-Time Access for Amazon EKS
In this article, which follows Part 1 and Part 2 of our blog series, we’ll cover just-in-time access and provide a practical guide showing how to implement just-in-time access for EKS using Teleport.
Terminology definition
The concept of just-in-time privilege elevation provides access to critical systems for a limited period of time. Access to sensitive information will only be granted to administrators, users, applications, and scripts when necessary and only for the required time.
The term ChatOps refers to the use of instant messaging platforms such as Slack, Jira, and PagerDuty for alerting or notifying users of changes to the system. When DevOps workflows need human involvement from time to time, ChatOps becomes a valuable tool. It makes users and teams aware of potential outages and incidents and even prompts them to approve or deny requests.
Administrators are notified by combining just-in-time privilege elevation with ChatOps, allowing them to interactively approve time-bound privilege escalation requests.
With Teleport Enterprise, customers can leverage RBAC, access requests and Slack integration to implement highly efficient workflows for temporary privilege escalation to access clusters provisioned through Amazon EKS.
After we discussed securing Amazon EKS clusters with Identity-Aware Access Proxy (in Part 1) and How to Configure Single Sign-On (SSO) for Accessing AWS EKS Clusters (in Part 2) of this series, here we discuss a new scenario.
Privilege escalation for accessing Amazon EKS Clusters with Teleport
Let's consider a scenario where an AWS customer has outsourced DevOps and infrastructure management to a third-party MSP (Managed Service Provider). The external service providers are managed by a full-time employee (team leader) who is authorized to approve or deny privileged access requests. To avoid unwanted exposure resulting in credential exploitation and misconfiguration, the organization wants to implement just-in-time privilege elevation that should expire after a specified period of time.

The above diagram shows an example. A contractor from the service provider’s team will have to request access to a production Amazon EKS cluster to perform maintenance operations once a week. Since these operations can be completed within an hour, the team leader approves the escalation request, which is valid only for an hour. The privilege escalation request is sent to the team leader via a Slack channel through which the team leader can approve or deny the request. After the time window expires, the contractor can no longer access the production cluster.
This tutorial builds on the first part of this series, where we configured the Teleport proxy, auth server, and the Teleport Kubernetes agent running in Amazon EKS clusters.
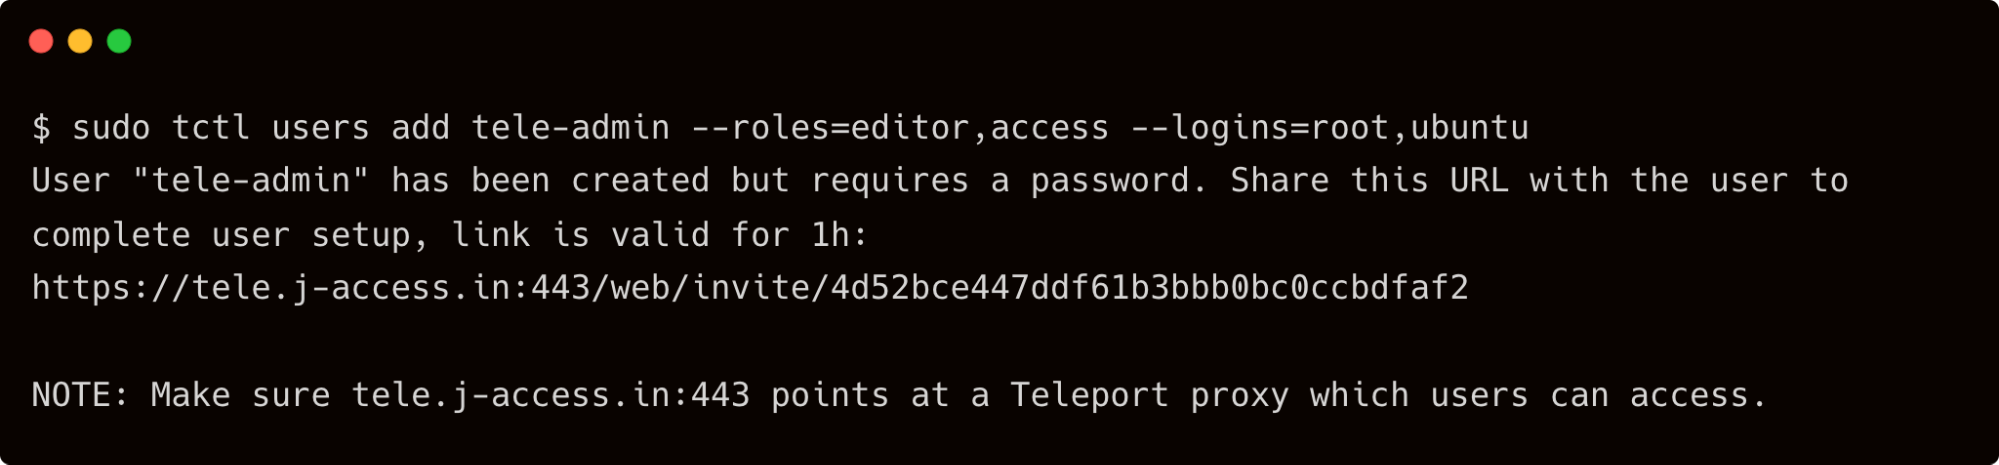
This tutorial also assumes that you have created a local user account, tele-admin, in Teleport with editor and access roles. Refer to the first part of the series for the details on adding the local account to Teleport.
Step 1 - Creating roles and users in Teleport Enterprise
Let’s go ahead and create the roles that represent the contractor, EKS administrator and team lead personas.
kind: role
version: v5
metadata:
  name: contractor
spec:
  allow:
    request:
      roles:
      - eks-admin
    kubernetes_groups: ["system:masters"]
    kubernetes_labels:
      'env': 'staging'

tctl create -f contractor.yaml
The above role explicitly provides access to the Amazon EKS staging cluster while allowing the role to occasionally request the privilege escalation based on the eks-admin role.
The next role, eks-admin, provides unrestricted access to all the EKS clusters but only for an hour. The max_session_ttl value enforces the time-bound access for any user in this role. John, the contractor, will occasionally assume the role of an EKS administrator to access production clusters.
kind: role
version: v5
metadata:
  name: eks-admin
spec:
  allow:
    kubernetes_groups: ["system:masters"]
    kubernetes_labels:
      '*': '*'
  options:
    max_session_ttl: 1h

tctl create -f eks-admin.yaml
Finally, let’s create the team lead role that has permission to approve privilege escalation requests. Dave, the full-time employee and the team leader of the project, will assume this role.
kind: role
version: v5
metadata:
  name: team-lead
spec:
  allow:
    impersonate:
       users: ['*']
       roles: ['*']
    review_requests:
      roles:
      - 'eks-admin'
    rules:
    - resources:
      - access_request
      verbs:
      - list
      - read
      - update
      - delete

tctl create -f team-lead.yaml
Verify the roles with the below command:
tctl get roles --format=text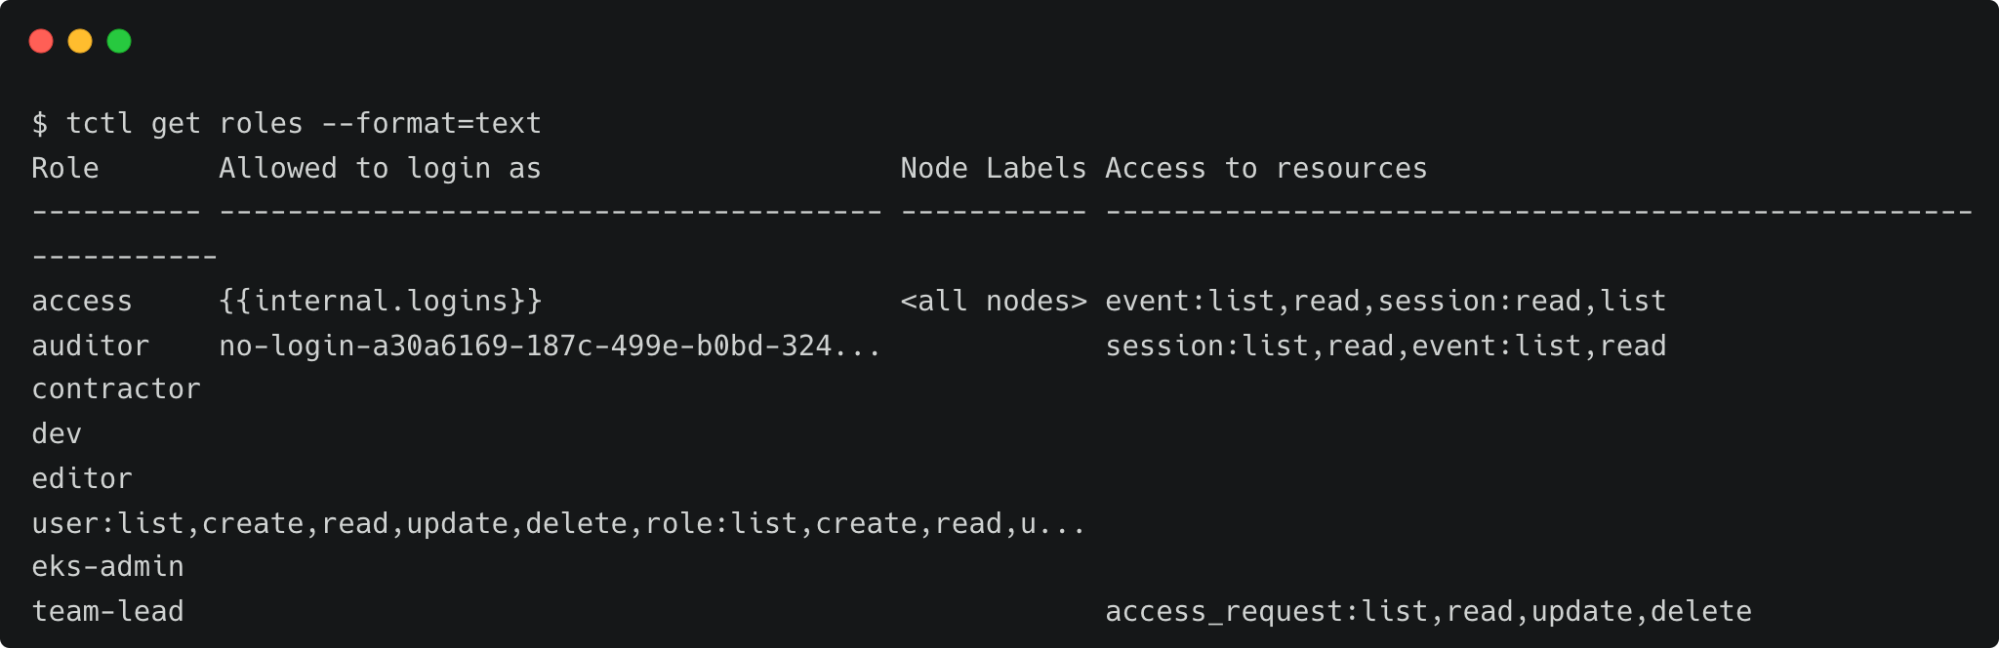
With the roles in place, let’s go ahead and create local users that map to the personas defined for this scenario.
First, let’s create the user john, who is added to the contractor role.
tctl users add --roles=access,contractor johnThen, we will create user dave, who assumes the role of the team lead. Dave is also added to the preset roles of access, auditor and editor, which give him all the permissions available to the Teleport administrator.
tctl users add --roles=access,auditor,editor,team-lead daveLet’s log in as John and explore the assigned access boundary.
tsh login --proxy=tele.j-access.in --auth=local --user=johnNote: In our demo we create local users. We recommend using SSO and RBAC mapping once rolling out production.
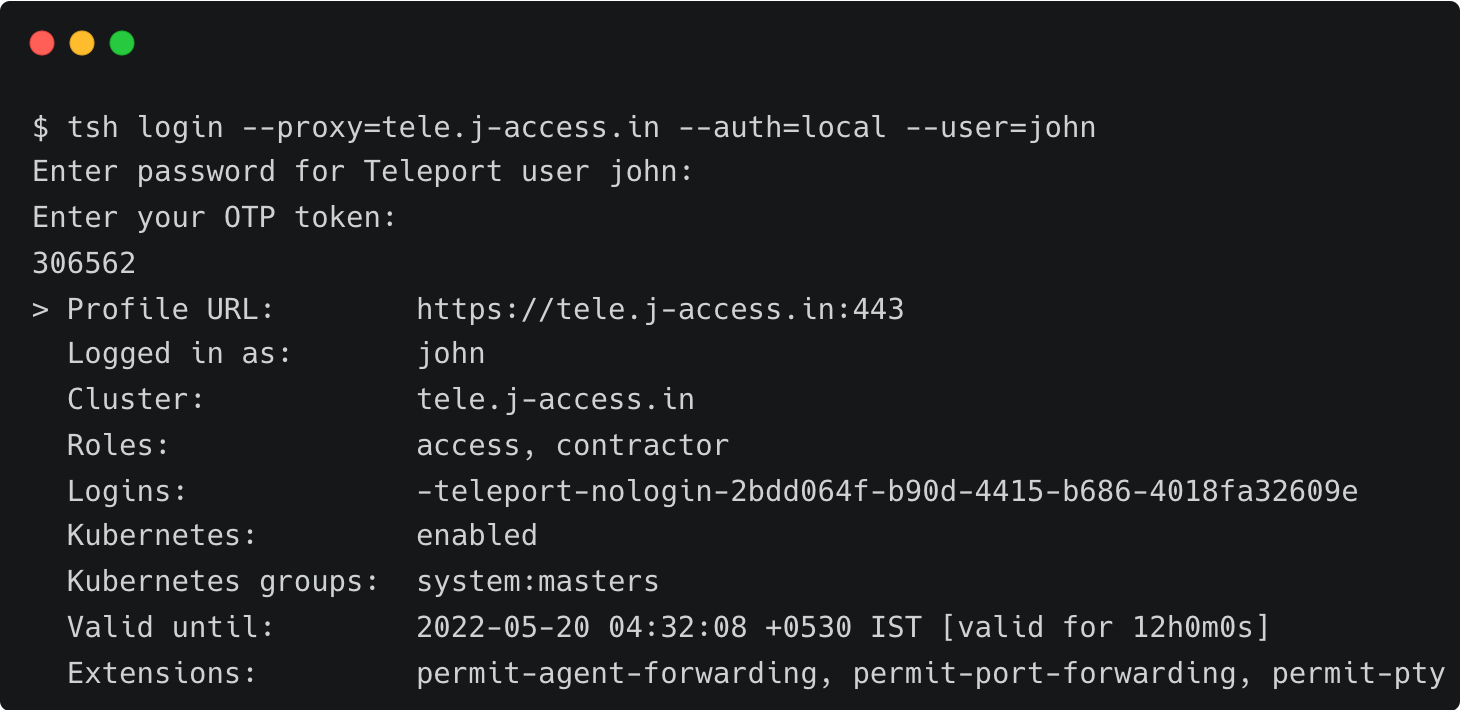
John can now login to the staging cluster to access the Kubernetes API.
tsh kube login staging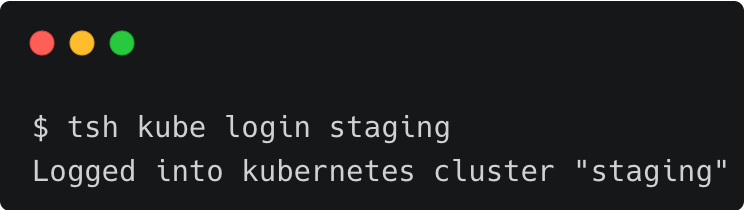
kubectl get nodesBut when John tries to login and access the production cluster, he gets an error.
tsh kube login productionJohn has no access to any cluster except staging, which is explicitly defined in the Teleport contractor role.
| Teleport User | Persona | Teleport Roles |
| Dave | Team Leader | access, auditor, editor, team-lead |
| John | Contractor | access, contractor |
| John | EKS Admin* | access, eks-admin |
Step 2 - Implementing privilege escalation workflow.
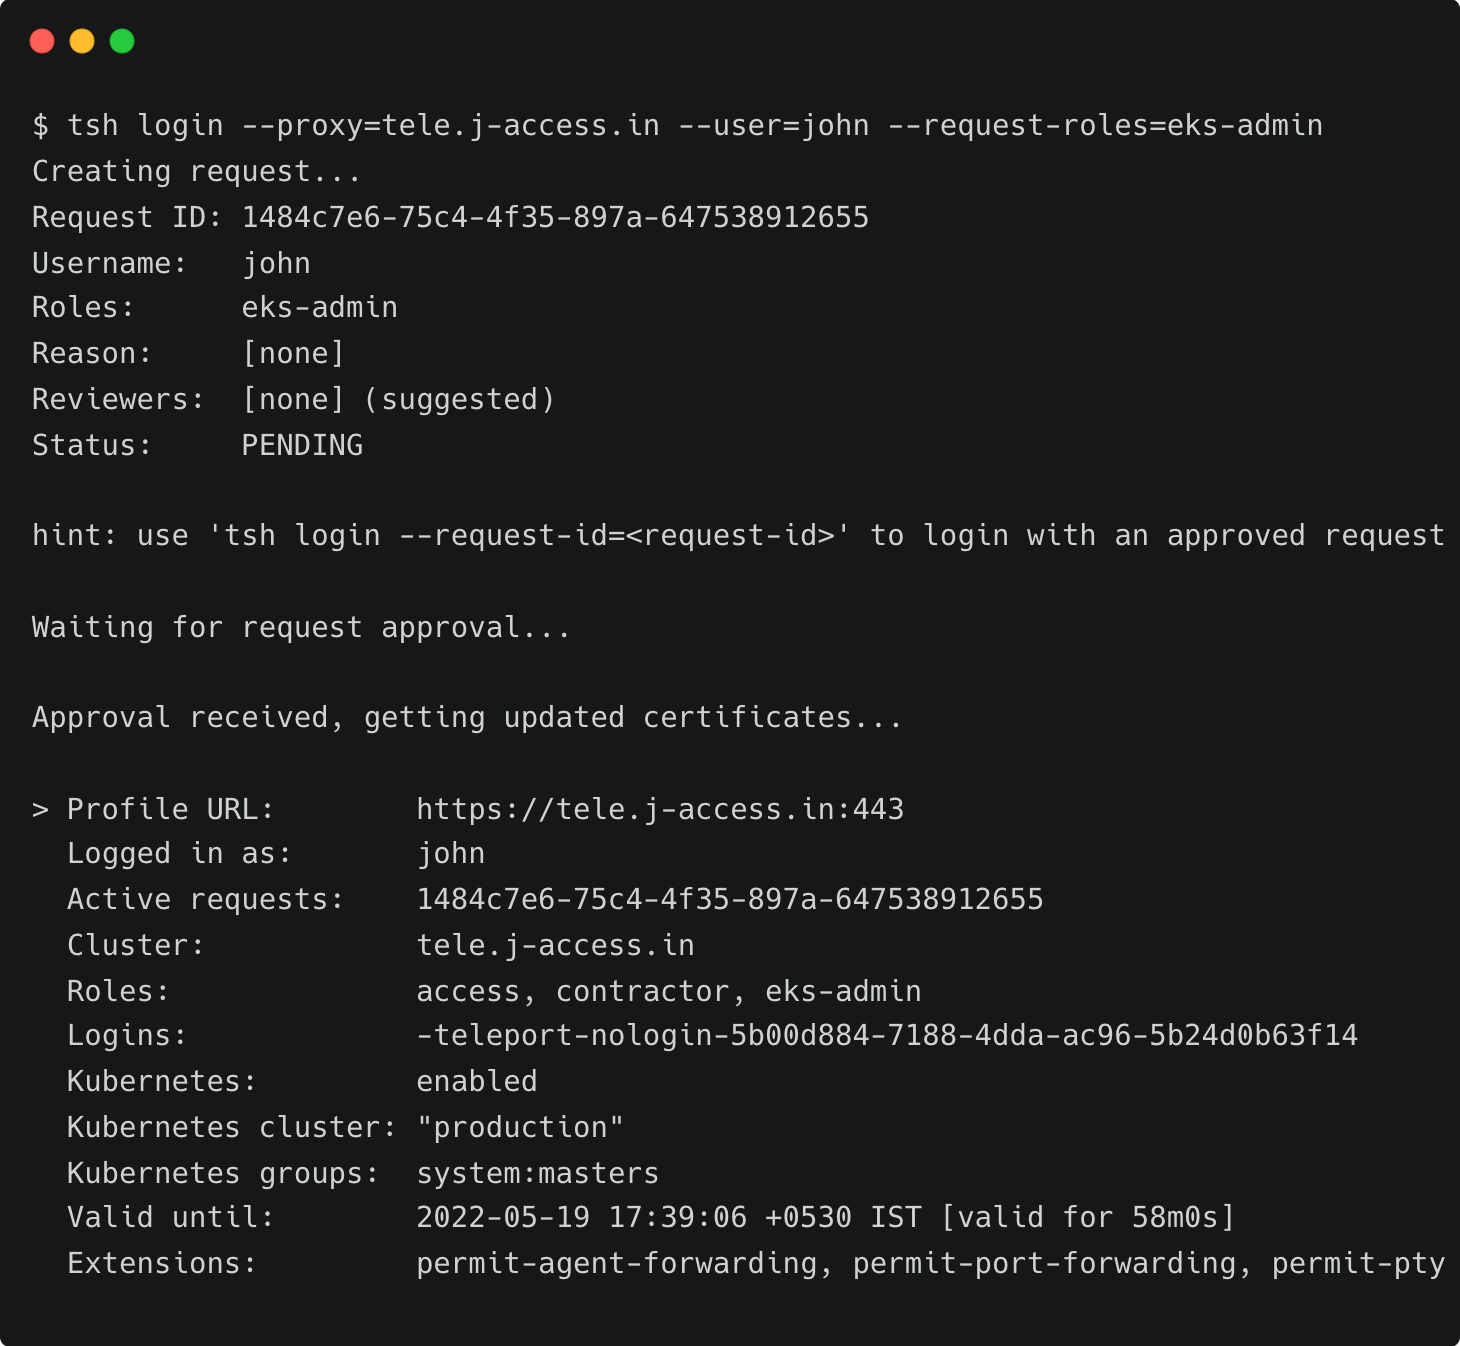
Now is the time for John to request just-in-time privilege escalation to access the production EKS cluster. John initiates a new session by passing the --request-roles switch to the tsh command-line tool.
tsh login --proxy=tele.j-access.in --user=john --request-roles=eks-adminThe request for privilege escalation is now pending. When Dave, the team lead, approves it, John will temporarily assume the role of eks-admin that provides him unrestricted access to all the clusters.
Let’s log in as Dave to approve the request.
tsh login --proxy=tele.j-access.in --auth=local --user=davetctl request ls
tctl request approve 1484c7e6-75c4-4f35-897a-647538912655As soon as it is approved, John completes the login process. John has approximately an hour to complete the maintenance tasks.
Let’s see if John can access the production cluster.

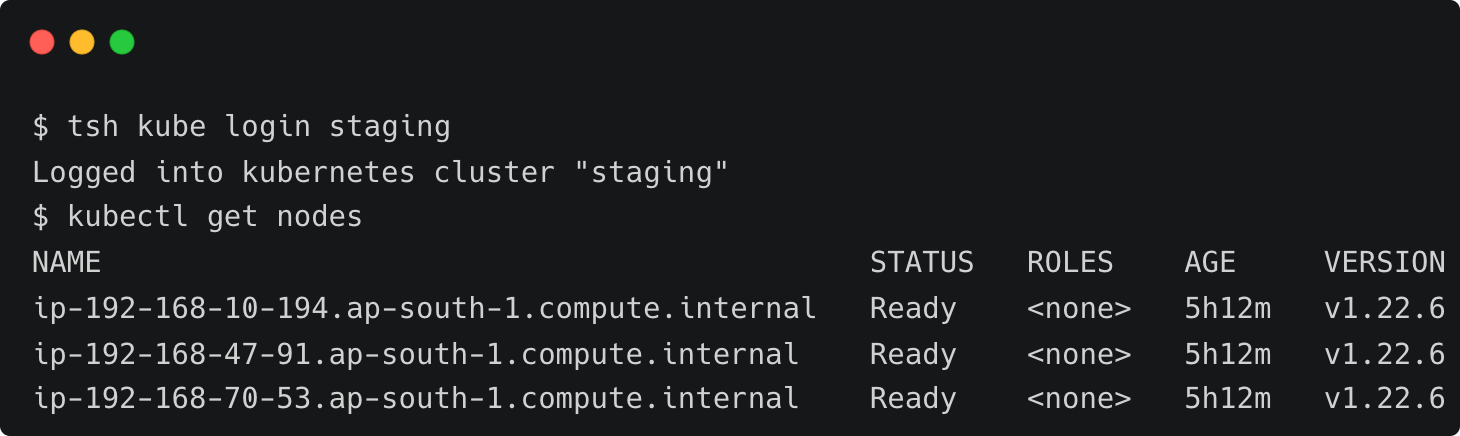
As we can see from the above screenshot, John is able to switch between all the available clusters.
After the time window defined in the policy expires, John has to send a request to Dave for a new session with escalated privilege.
When John raises a request, Dave needs to be notified that there is a pending request waiting for approval. For sending the alert, let’s configure Slack which alerts Dave when access is requested by the users.
Step 3 - Configuring Slack to approve or reject access requests
First, we should create a user and a role required by the Slack plugin.
kind: user
metadata:
  name: access-plugin
spec:
  roles: ['access-plugin']
version: v2
---
kind: role
version: v4
metadata:
  name: access-plugin
spec:
  allow:
    rules:
      - resources: ['access_request']
        verbs: ['list', 'read']
      - resources: ['access_plugin_data']
        verbs: ['update']

tctl create -f access-plugin.yaml
Teleport's plugins use the access-plugin role and user to approve access requests. We export the identity files to this plugin.
Sign into Teleport as Dave to impersonate the access-plugin user to export the identity files.
tsh login --proxy=tele.j-access.in --auth=local --user=davetctl auth sign --format=tls --user=access-plugin --out=auth --ttl=2190hThe above command dumps three files — auth.key, auth.cas and auth.crt. We will need these files to complete one of the later steps of the tutorial.
Now is the time to configure the Slack application. Visit https://api.slack.com/apps to create a new Slack app.
Give the app a name and choose the workplace where you want to get the notification.
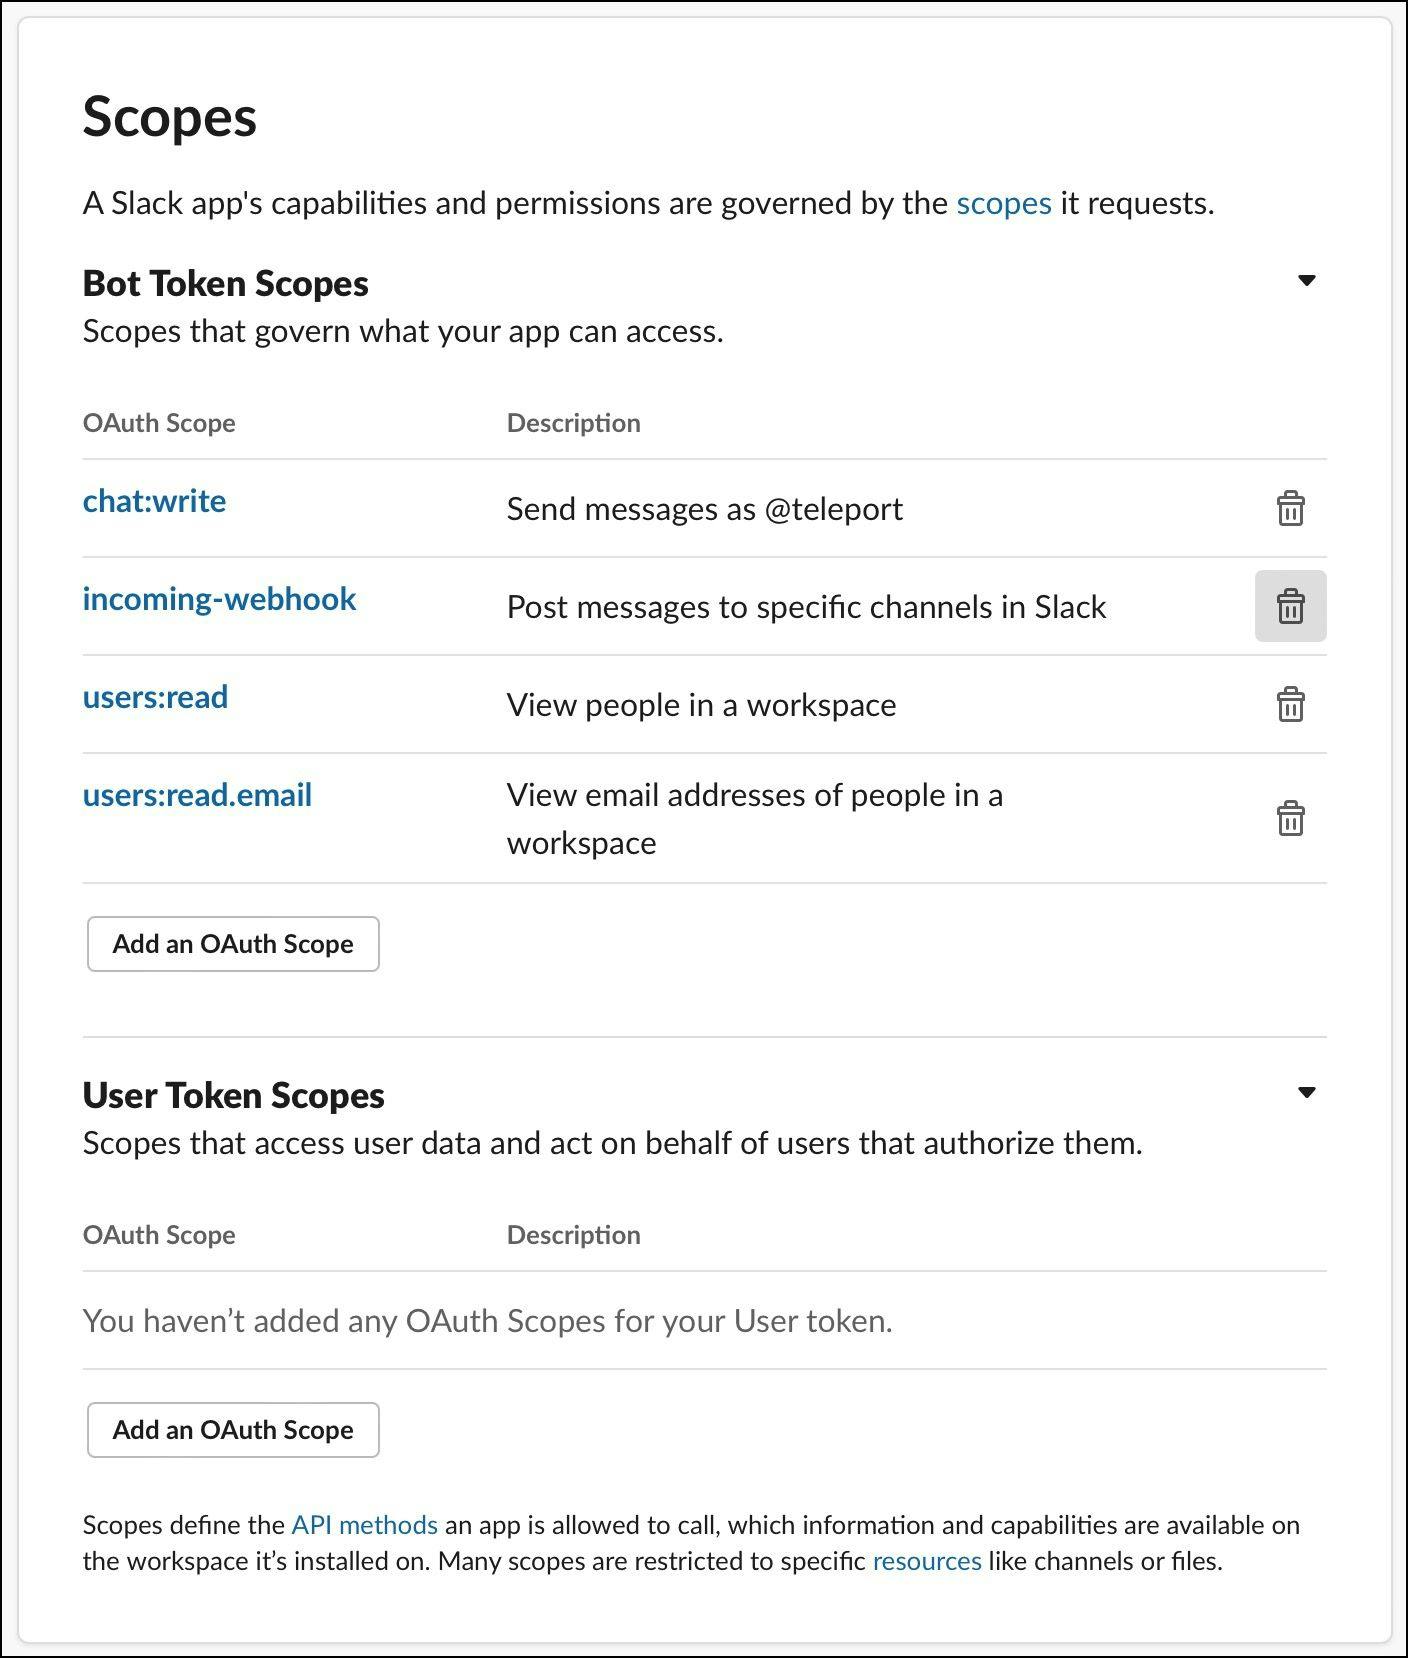
Under the OAuth and Permissions section of the left navigation bar, choose scopes and add chat:write, incoming-webhook, users:read, users:read.email oAuth scopes. This will let the plugin post messages to the Slack channel.
Access the Bot User OAuth token and copy it for later use.
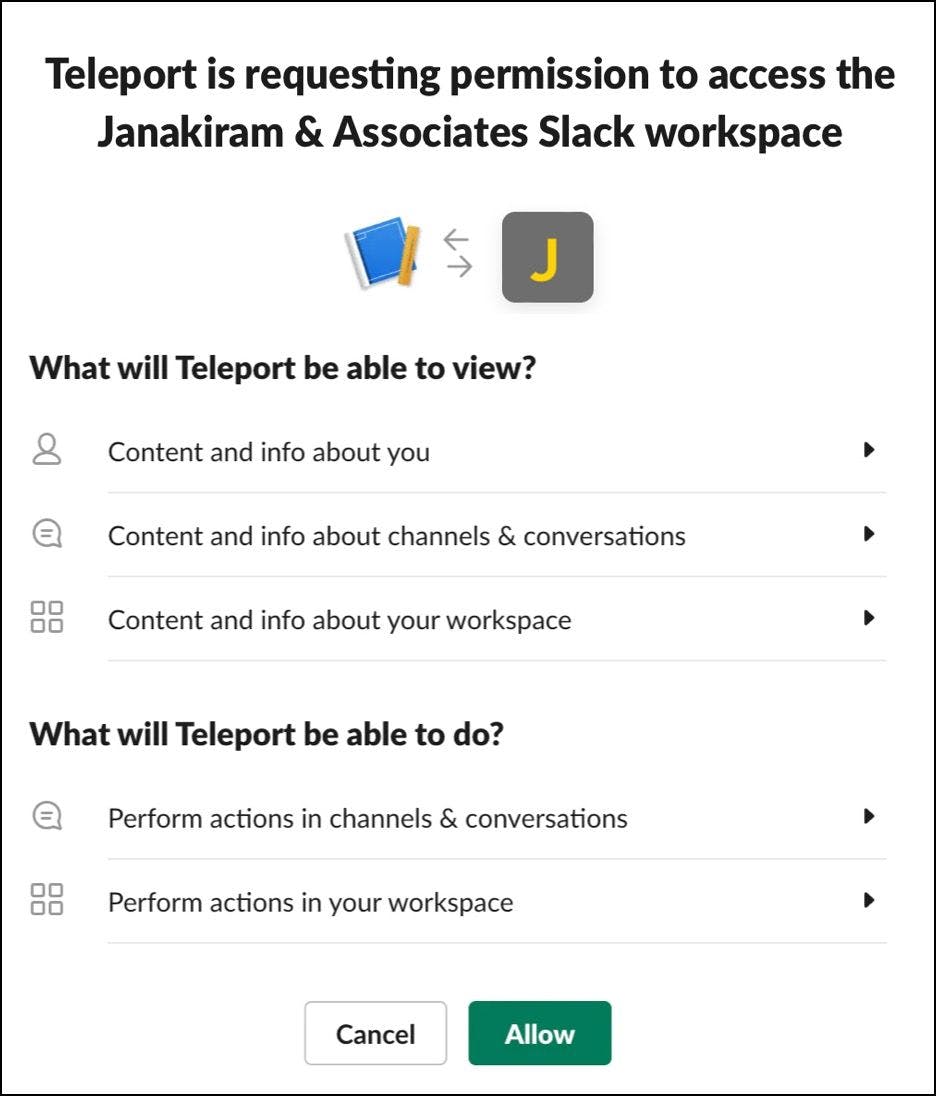
Install the app in your workspace by allowing the bot to access the channel.
Finally, invite the Teleport bot into the teams channels in your Slack app.

With the Slack bot in place, let’s connect that to Teleport.
SSH into Teleport proxy and run the below commands that download and install the Slack plugin.
curl -L https://get.gravitational.com/teleport-access-slack-v119.10.0-linux-amd64-bin.tar.gztar -xzf teleport-access-slack-v11.9.0.0-linux-amd64-bin.tar.gzcd teleport-access-slacksudo ./installCopy the auth files — auth.key, auth.cas and auth.crt — generated earlier to the /var/lib/teleport/plugins/slack/ directory.
Create the file by name teleport-slack.toml under the /etc/ directory with the below content:
[teleport]
addr = "tele.j-access.in:3025"           # Teleport Auth Server GRPC API address
client_key = "/var/lib/teleport/plugins/slack/auth.key" # Teleport GRPC client secret key
client_crt = "/var/lib/teleport/plugins/slack/auth.crt" # Teleport GRPC client certificate
root_cas = "/var/lib/teleport/plugins/slack/auth.cas"   # Teleport cluster CA certs

[slack]
token = "SLACK_oAUTH_TOKEN"             # Slack Bot OAuth token

[role_to_recipients]
"*" = "team"

[log]
output = "stderr"
severity = "INFO"
Launch another terminal and SSH into Teleport proxy to start the Slack plugin.
teleport-slack start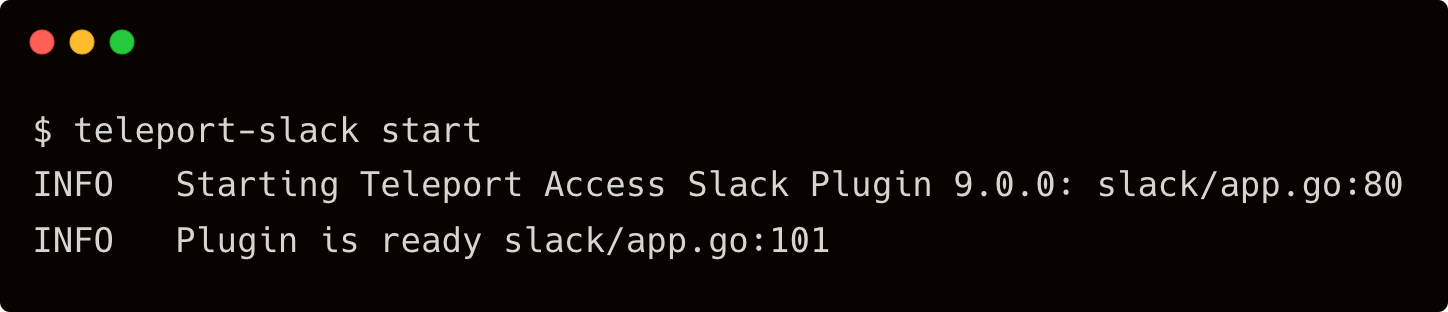
In your workstation, login to Teleport proxy as user john requesting for privileged access:
tsh login --proxy=tele.j-access.in --auth=local --user=john --request-roles=eks-adminImmediately, you will get a Slack notification with the request.
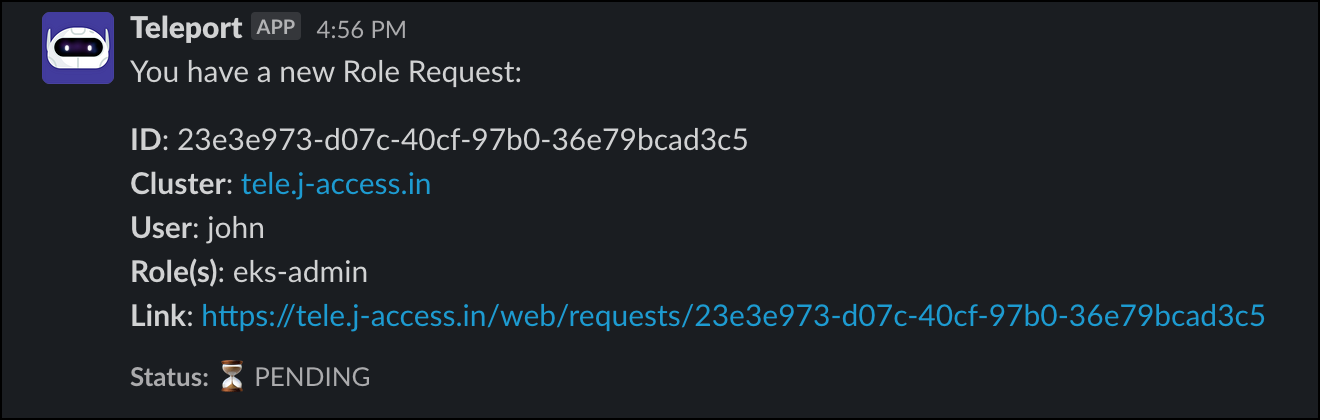
Click the link and login to the web UI as Dave. You should see a request waiting for approval.
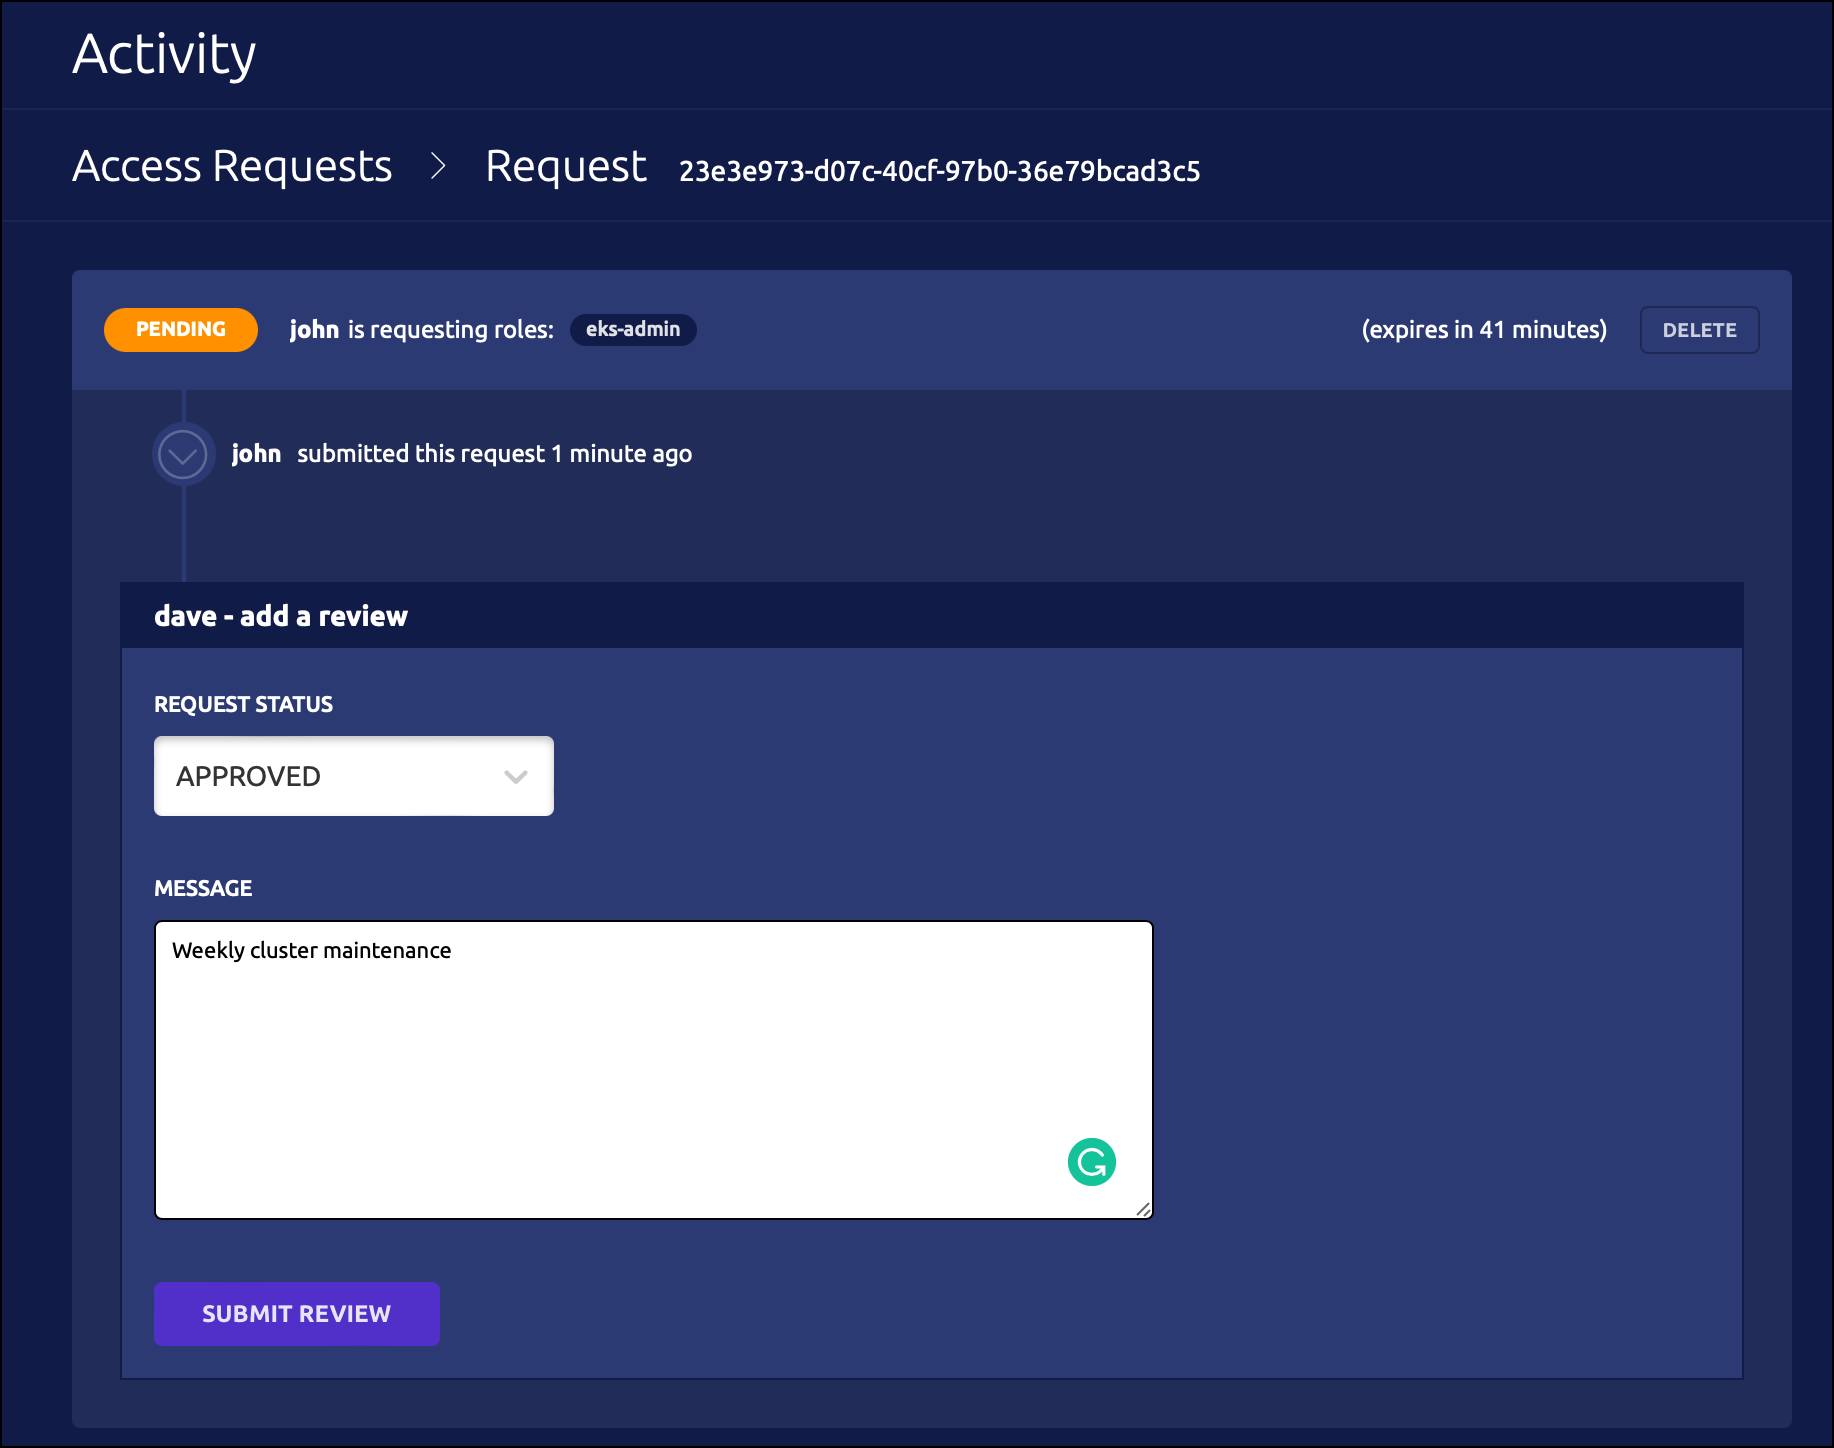
John’s terminal shows that the login request is approved as soon as it is approved.
Conclusion
This scenario demonstrated integrating Teleport RBAC with Slack to perform a just-in-time privilege escalation based on ChatOps. It highlights the need to configure time-bound sessions to avoid credential exploitation and possible misconfiguration of production clusters. The integration with Slack brings an intuitive alerting and approval process to the workflow.
Teleport's RBAC combined with Slack delivers a simple yet powerful mechanism of just-in-time privilege escalation. Learn more about how Teleport supports advanced authorization use cases using dual authorization, impersonation and moderated sessions.